


In this quick tutorial for Java developers, we will learn how to secure a Spring Boot REST API with Okta and go through a quick example.
All we need is
- Basic knowledge of Java (Java 8 or 11)
- Your favorite IDE (I recommend IntelliJ IDEA)
- An Okta account
- Postman
want to work with the latest tech?
Join EPAM Anywhere to revolutionize your project and get the recognition you deserve.
What is Okta?
Okta is an identity and management platform that manages and secures user authentication for applications. That means we don’t need to spend hours on the development of the security layer of the system (thus increasing the security risks) and maintenance that comes from building it yourself — we will delegate this tedious process to Okta.
Okta uses the OAUTH 2.0 standard and has various grant type authorization for applications such as client_credentials, authorization code, implicit, resource owner password, and many others.
You can check all these grant type authorizations on the official website.
The grant type for this tutorial will be client_credentials, and we’ll focus on protecting a Spring Boot REST API.
Now, let’s get started.
Securing REST API in Spring Boot step by step
First off, we’ll create an organization with the root objects for all Okta Objects such as users, groups, and our own authorization server too.
Remember, authorization server = the server that issues the access token.
1. Create your Okta account
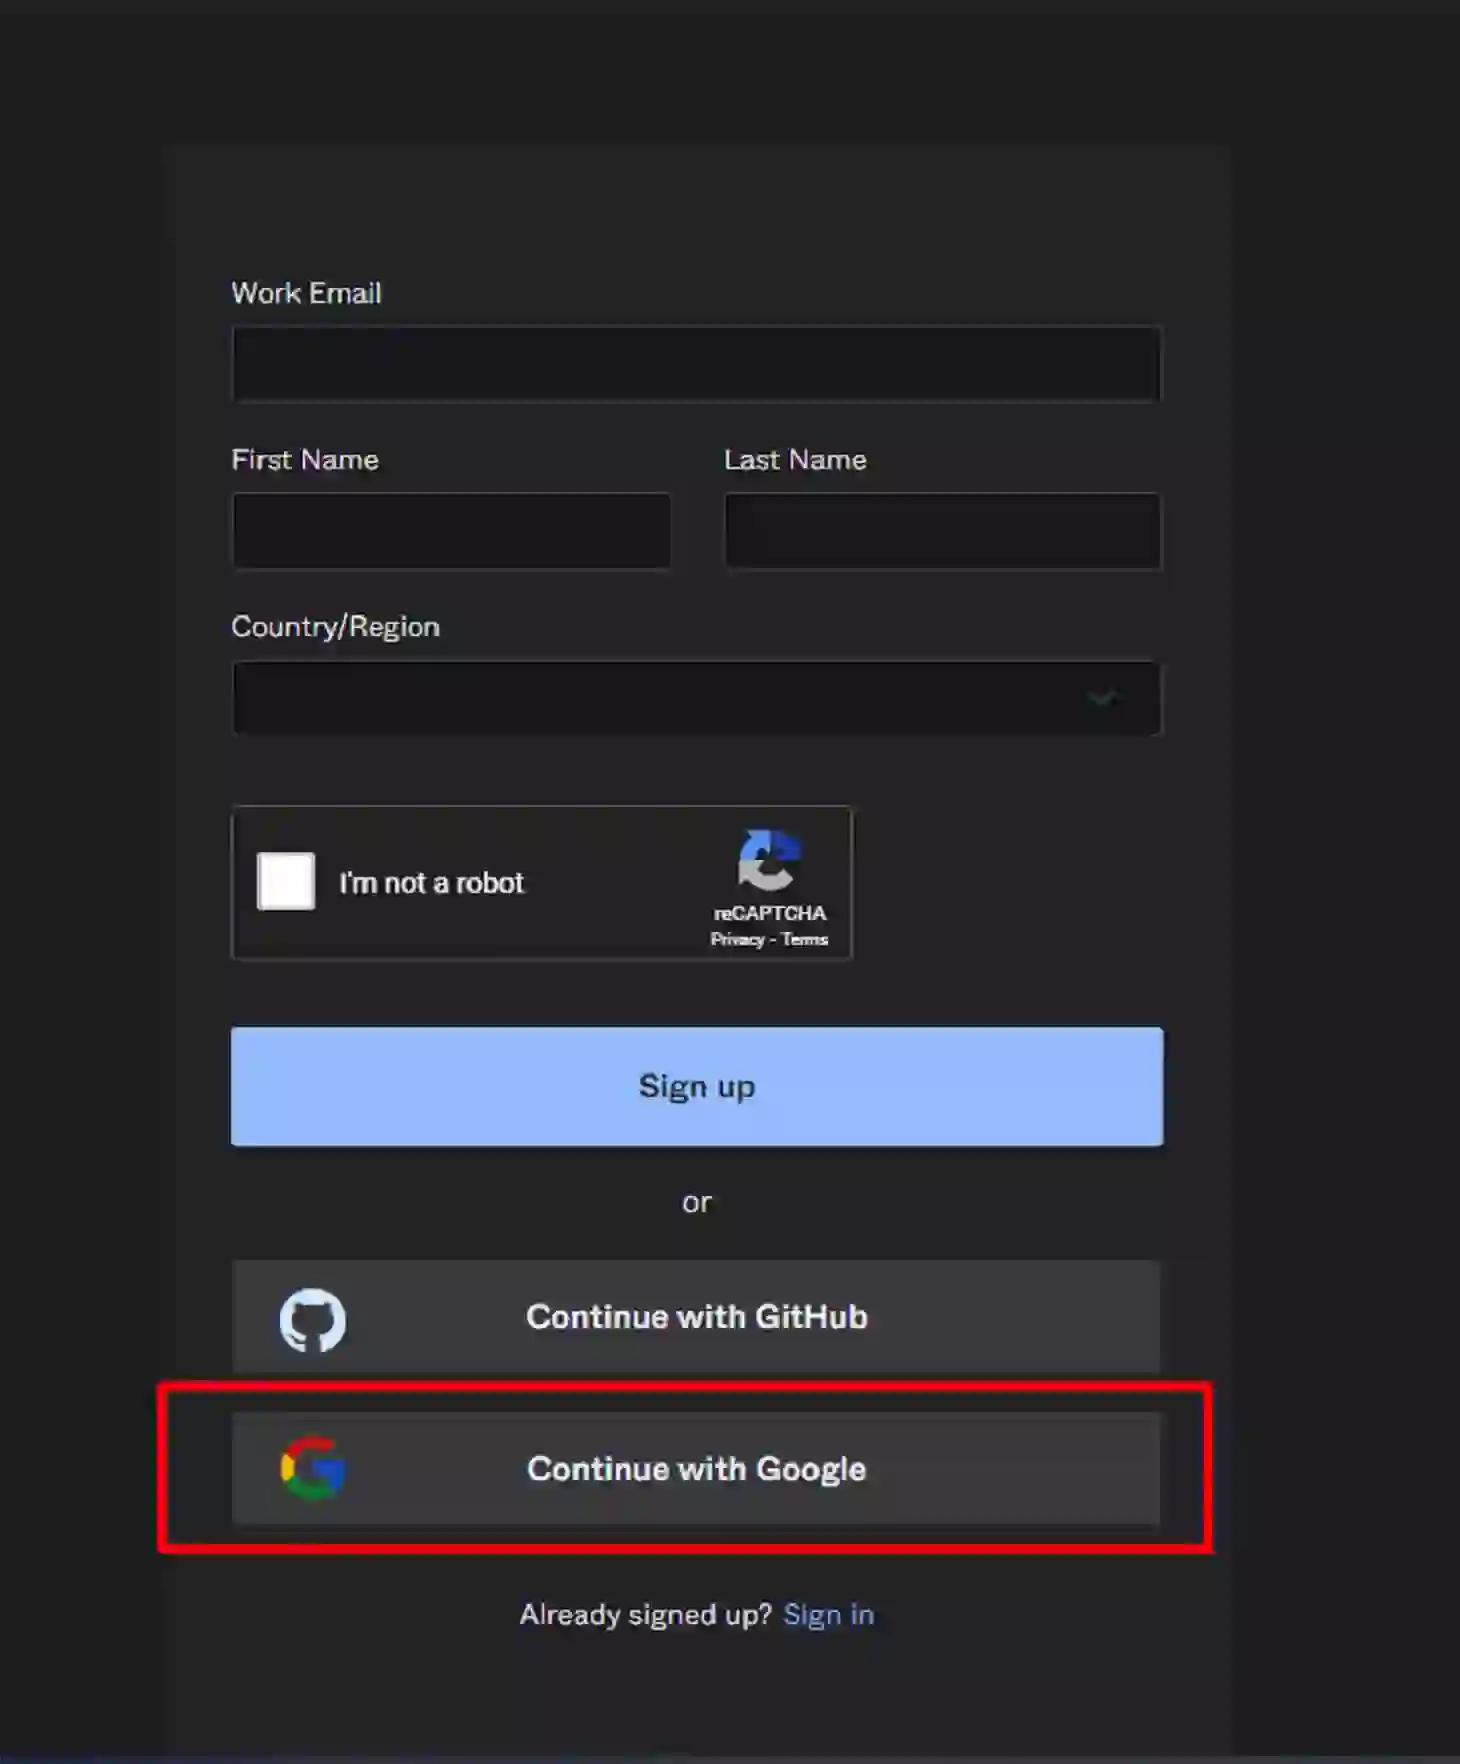
We’re going to create an Okta account using our Google Gmail account.
Go to the Okta signup page and continue with Google Gmail or sign up with your personal info.
Add your country and state to be redirected to the Google account authorization flow.
Once you’re registered, you should be redirected to the Okta dashboard.
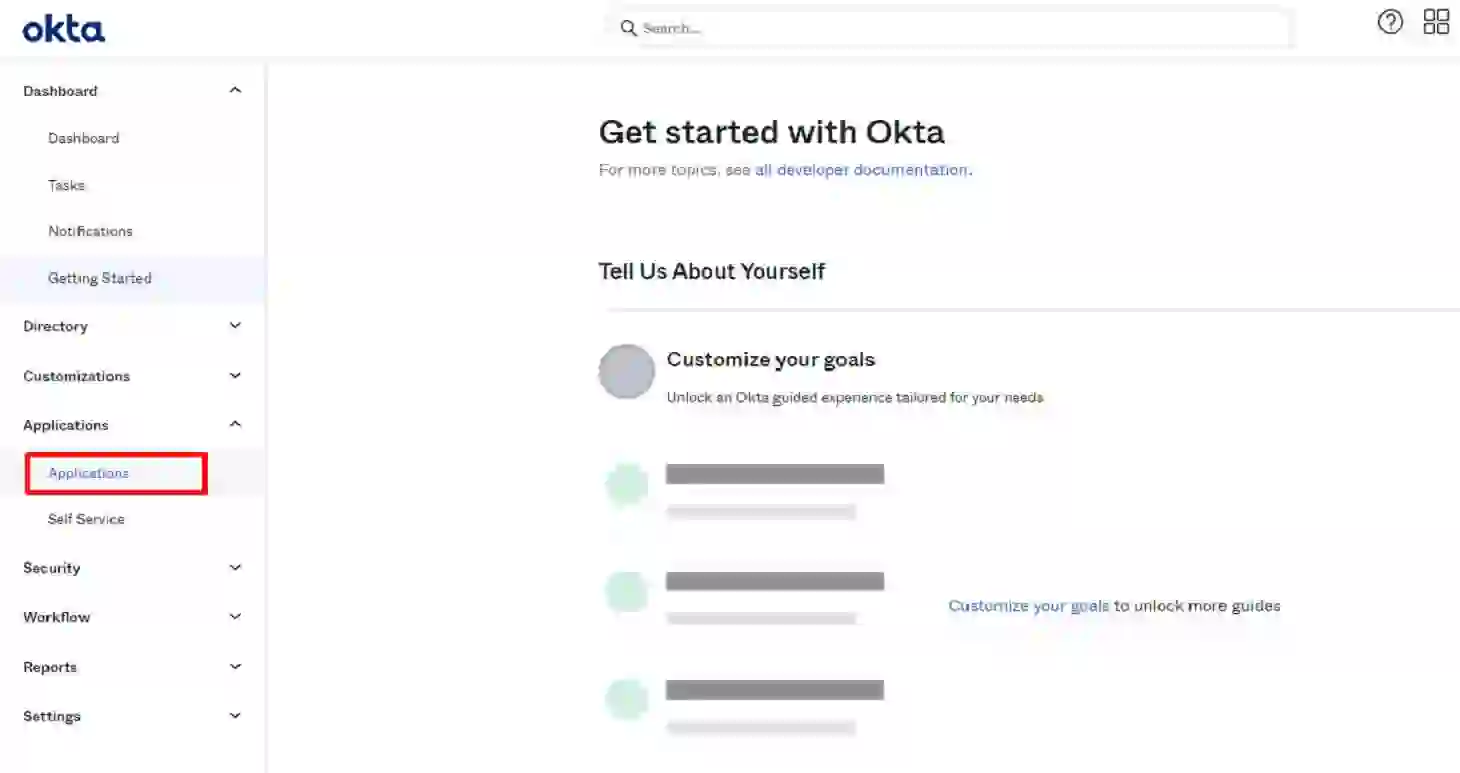
2. Create an application
We need to create an application to get some credentials that we’ll use to get access to the Okta authorization service.
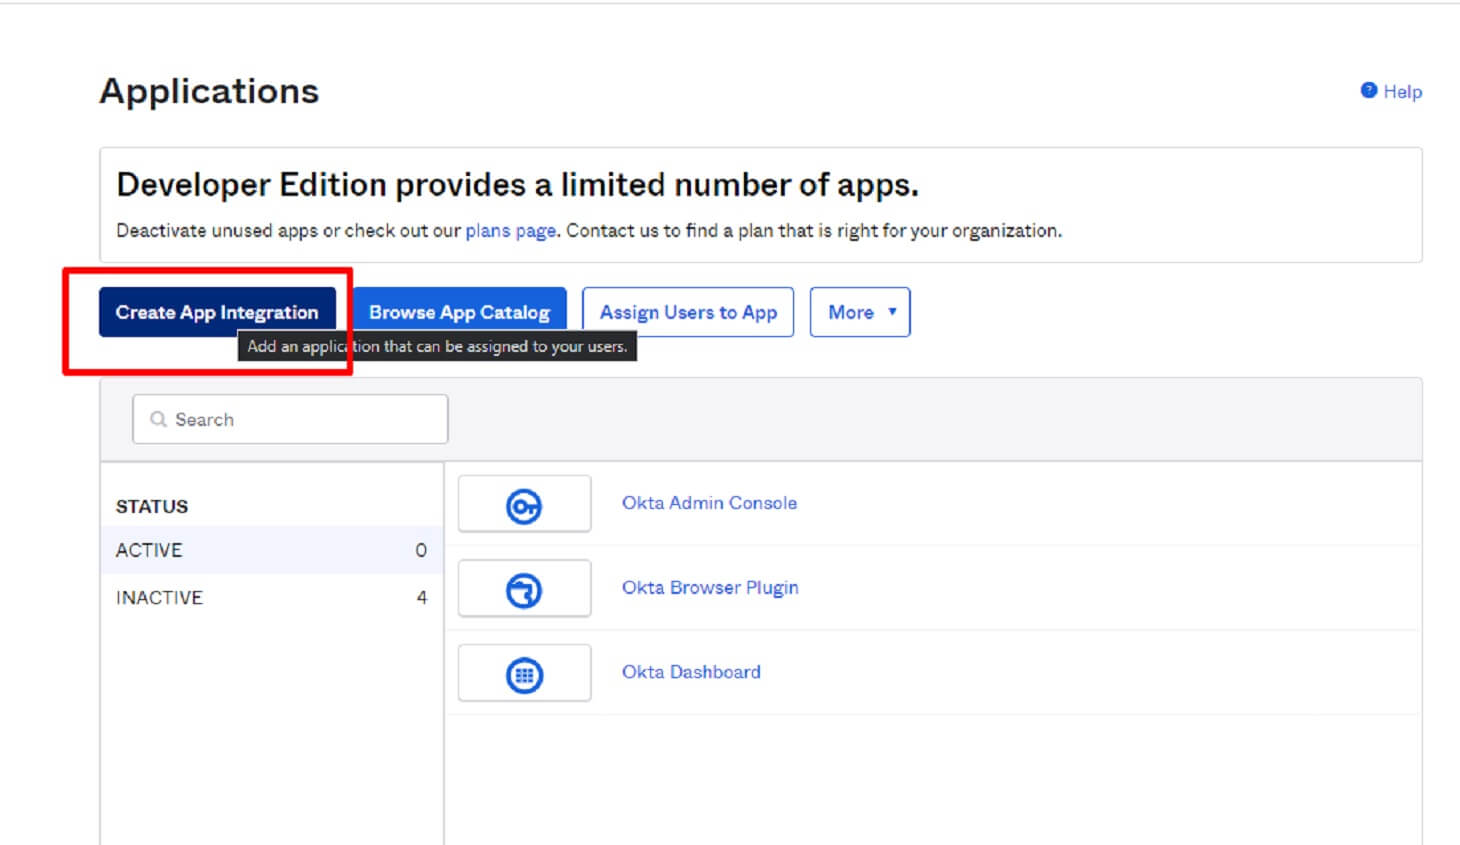
First, click on the Applications tab and choose the application option from the dropdown list.
Now click on the Create App Integration icon and choose the type of authorization method you want to use. In our case, this would be API Services.


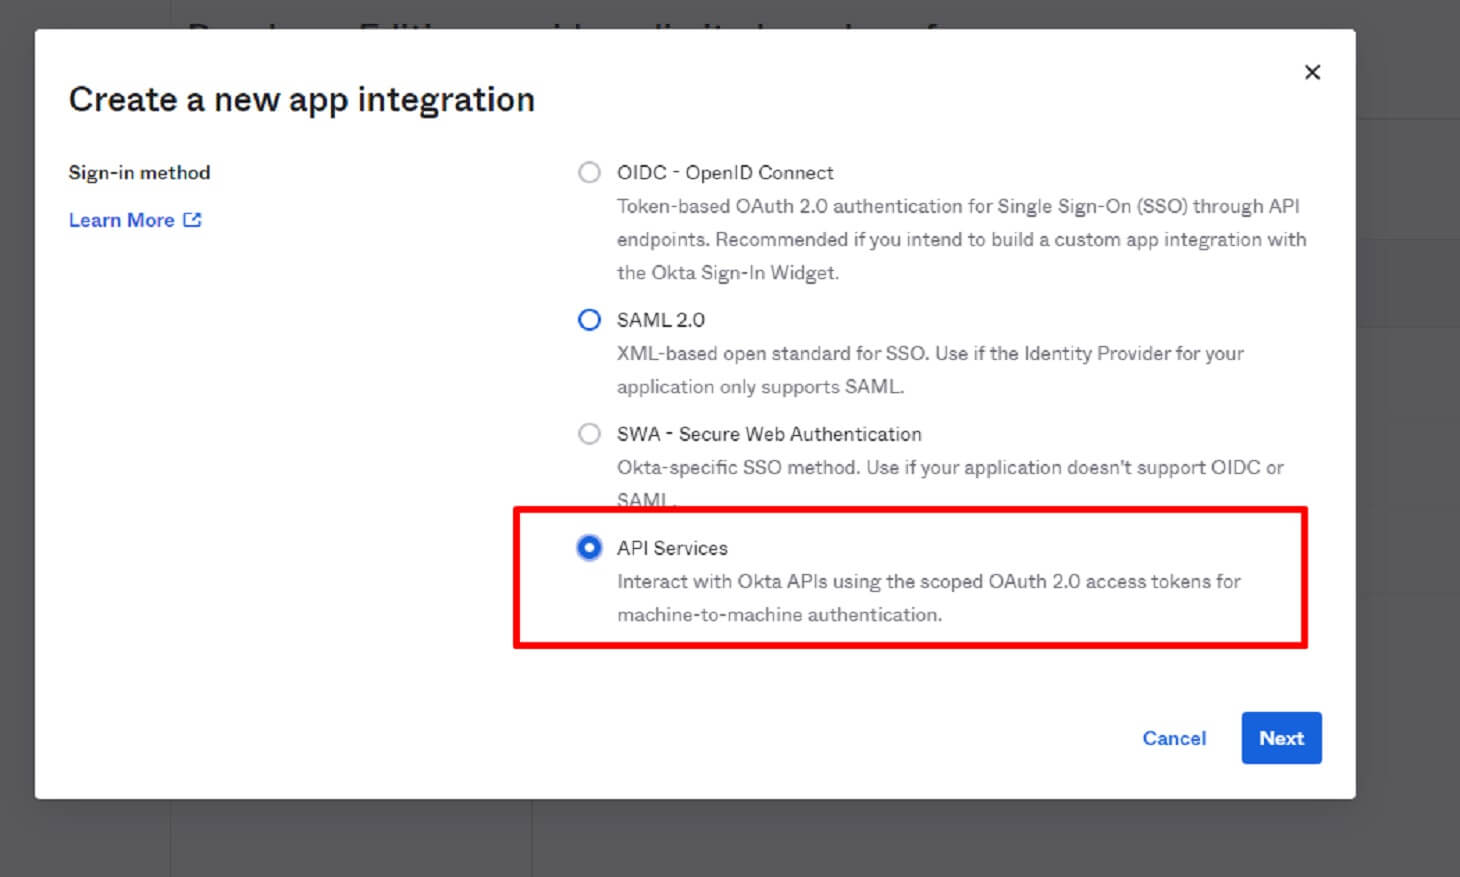
Choose a name for your application — we’ll put the name test-app for this example.
Now we’ve created the organization, so next, we need to save some important information such as client credentials, client secrets, and Okta domain id that we’ll be using later.

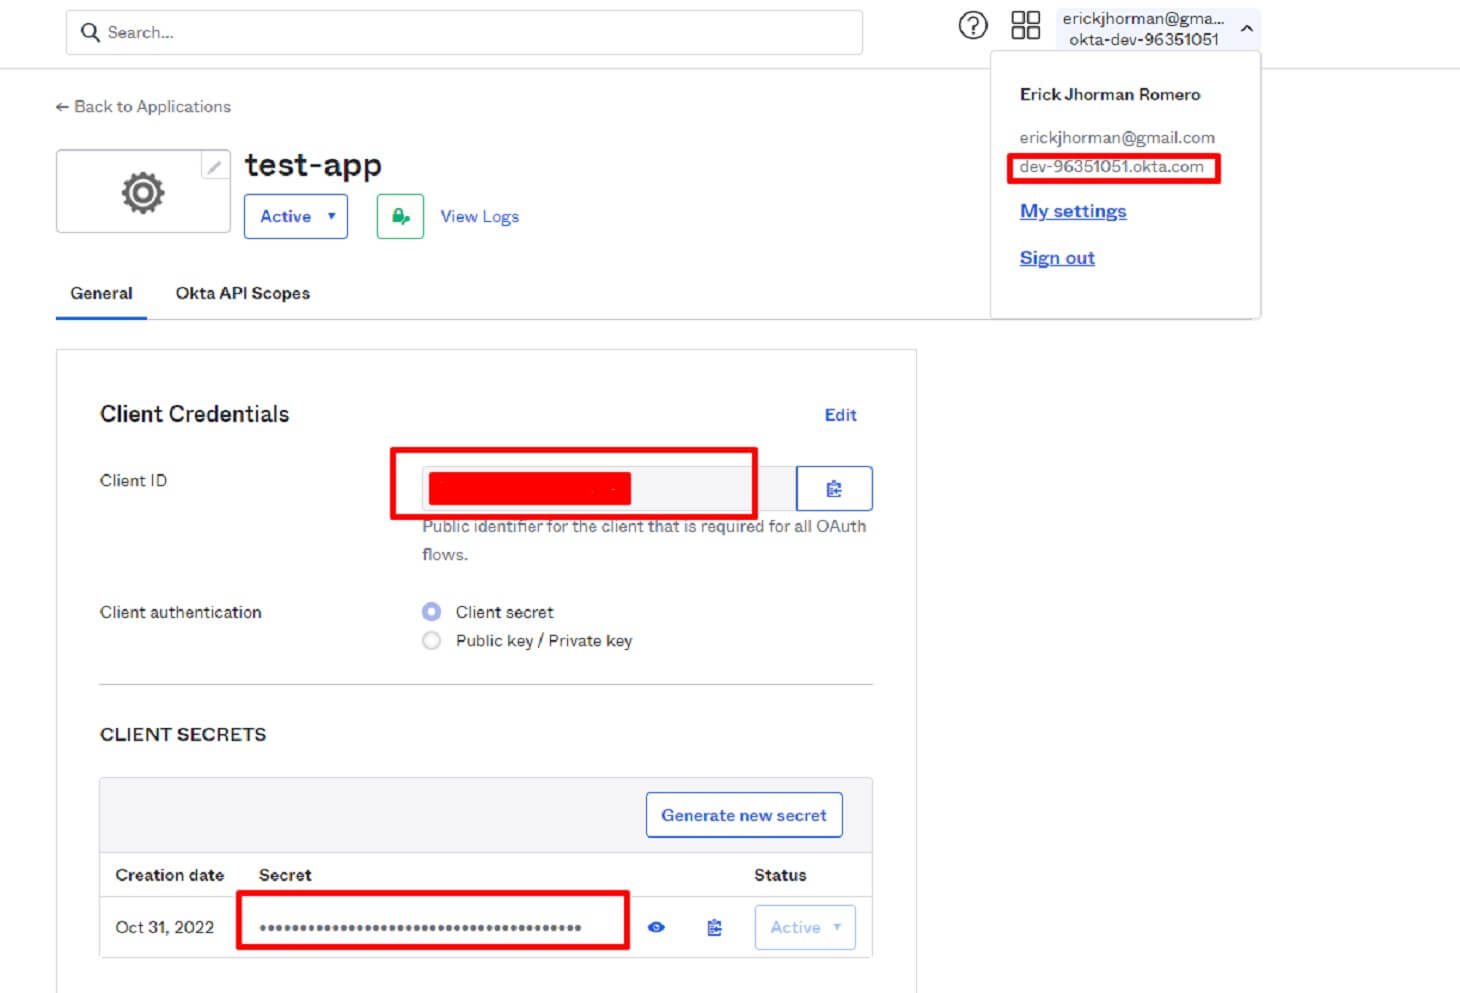
Save the ClientID, client secrets, and the Okta Domain in a secure place.
Client Id = Our public identifier to the OAuth flows.
Secret Id = Password for the client ID.
Okta Domain ID = The ID of the organization where our application is located.
Go to the Security tab and click on the API section, which you can find in the main sidebar of the Okta dashboard.

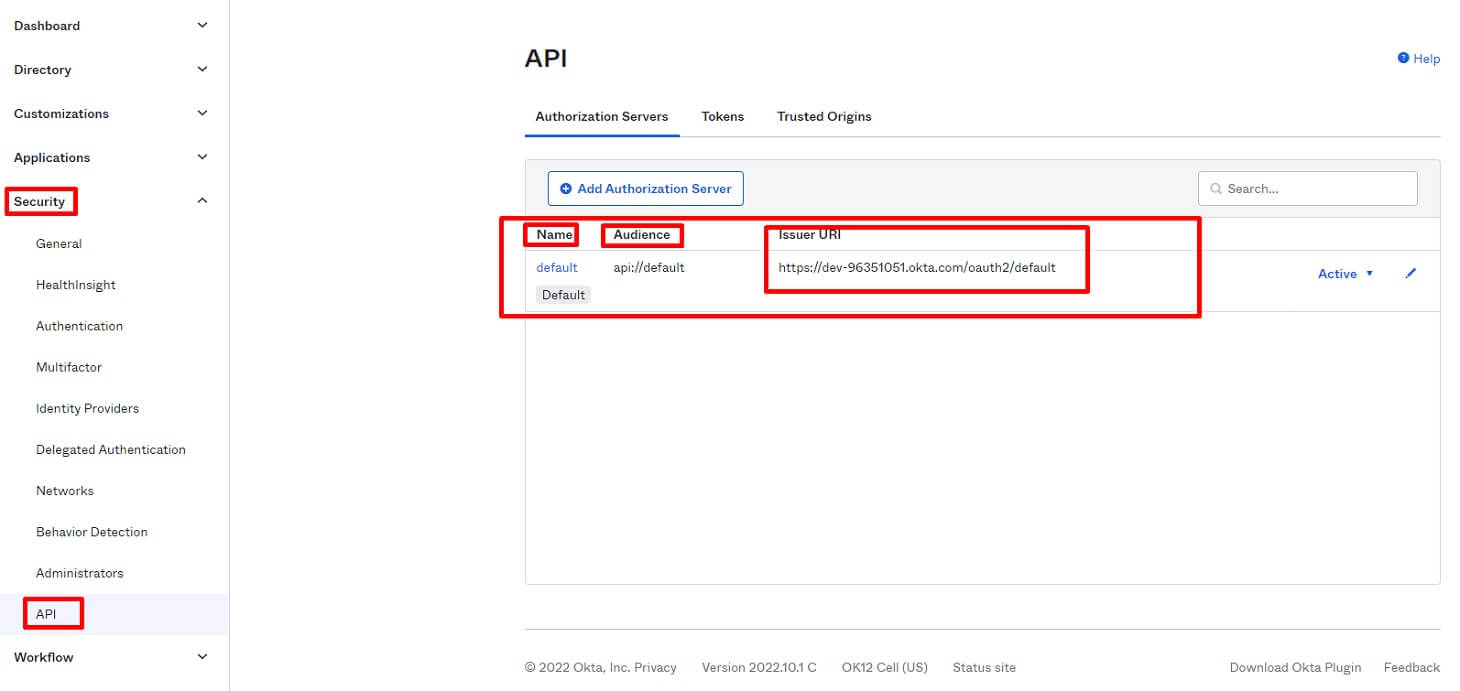
Here we have the following properties: authorization server name, audience, and issuer URI.
Audience = the claim aud to identify the recipient that the JWT is intended for.
Authorization server name = the name of the authorization server. In this case, I’m using the default one, but you can also create your own authorization server with the proper policies, scope, and claims. Get more information about this here.
Issuer URL is a unique identifier and a point to provide important metadata about the server, including a request for a token by adding the /v1/token path.

3. Set up your Spring Boot application
We already set up our authorization service, so now, we need to set up our Spring Boot application.
1. Clone this repo and move the rest to _api_branch2.
2. Add the next dependency to the pom.xml and load this new dependency.
This dependency will add the required classes to secure our application.
3. Now we need to configure the API, adding some properties to our application.yml.
Replace yourOktaDomain variable with your own Okta domain ID that you saved it before.
4. We already have our API configured, and we now need to create a security configuration class.
Add the next annotations to the SecurityConfigApp class and add the next code.
@Configuration
@EnableWebSecurity
These annotations will allow you to create a class of configuration type and enable web security within the application.


Your class should look like this:
We’re using a new way of creating a security configuration. Also, the code describes that the /api/home route has access to any request but that /api/users is protected, so we need to send a token to authorize and access it.
Find out more information about SecuityFilterChain class here.
That’s pretty much the implementation of securing an endpoint with Okta.

Testing your implementation
Now we’re going to test our implementation to get access to /api/users endpoint.
Go to the resources folder and import the secure_api_with_okta.postman_collection collection to obtain predefined requests.
We have three requests:
- Get Token = get the token from the authentication server.
- Get Home = this route can be accessed by anonymous users.
- Get Users = this route needs a token to see the result, so it’s protected.
If you go to Get Home and send a request, you should see the next message: Hello home and 200 http status code.
Go to the token request. We need to send two parameters to our body.
grant_type = Defines the type of flow we’re using to create the token — so in this case, we’re using the Client Credentials grant type.
scope = Describes the access privileges that you’re requesting of the authorization. For example, we’re using customScope because the client credentials flow doesn’t have a user context, so you must create a custom scope to retrieve some extra information for the token.
Now we're going to create custom scopes to be able to retrieve our token.
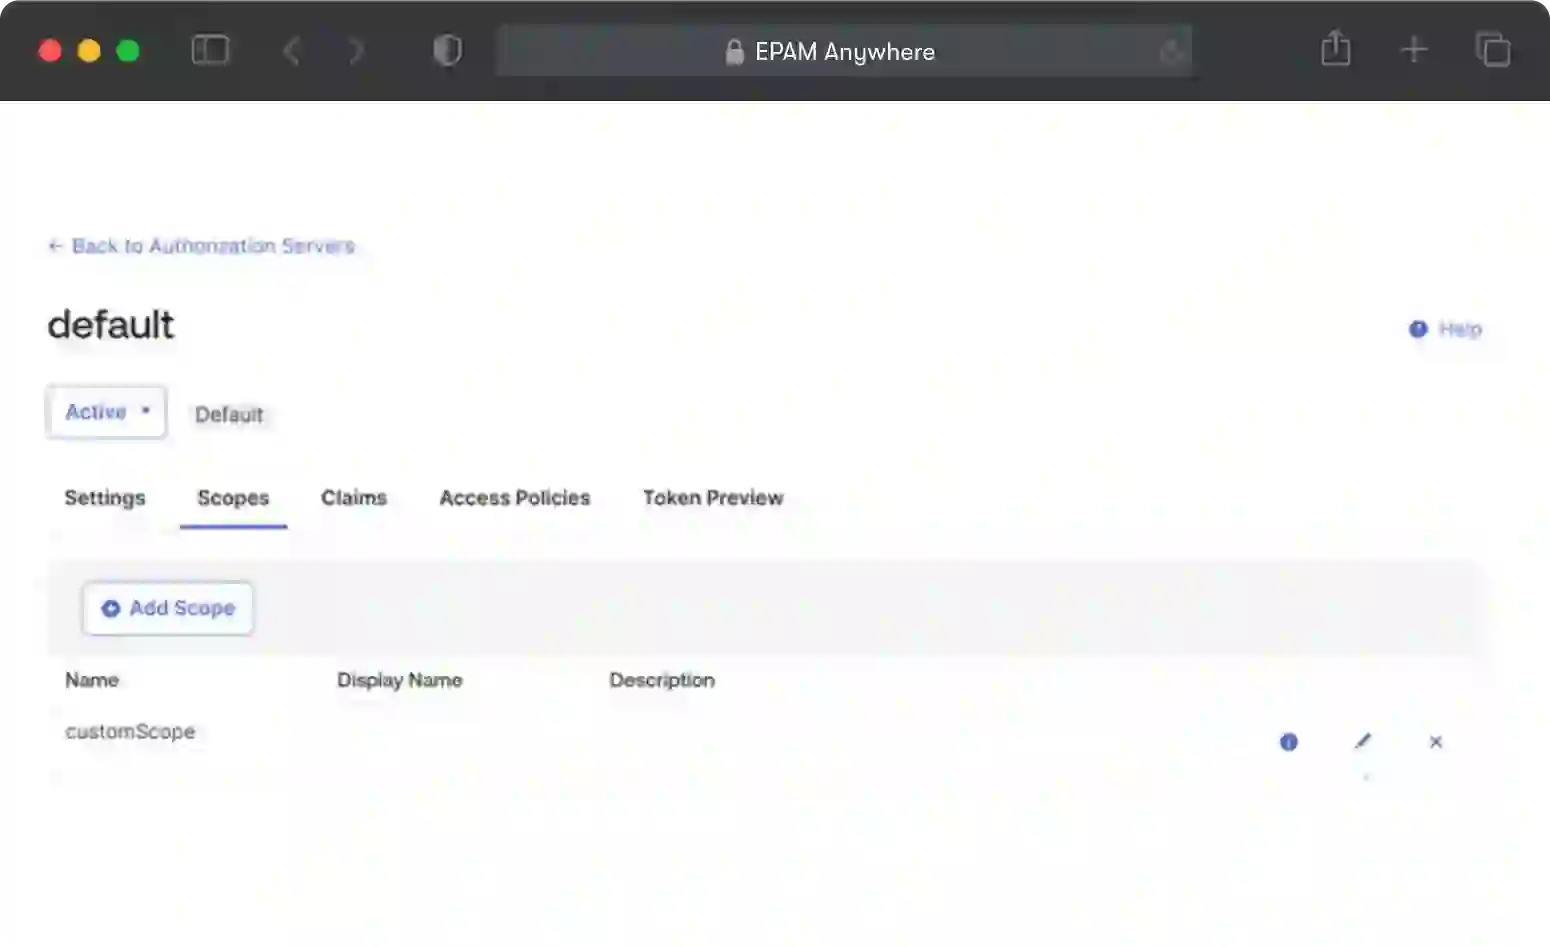
Go to authorization servers and add a new scope called Custom Scope like this:

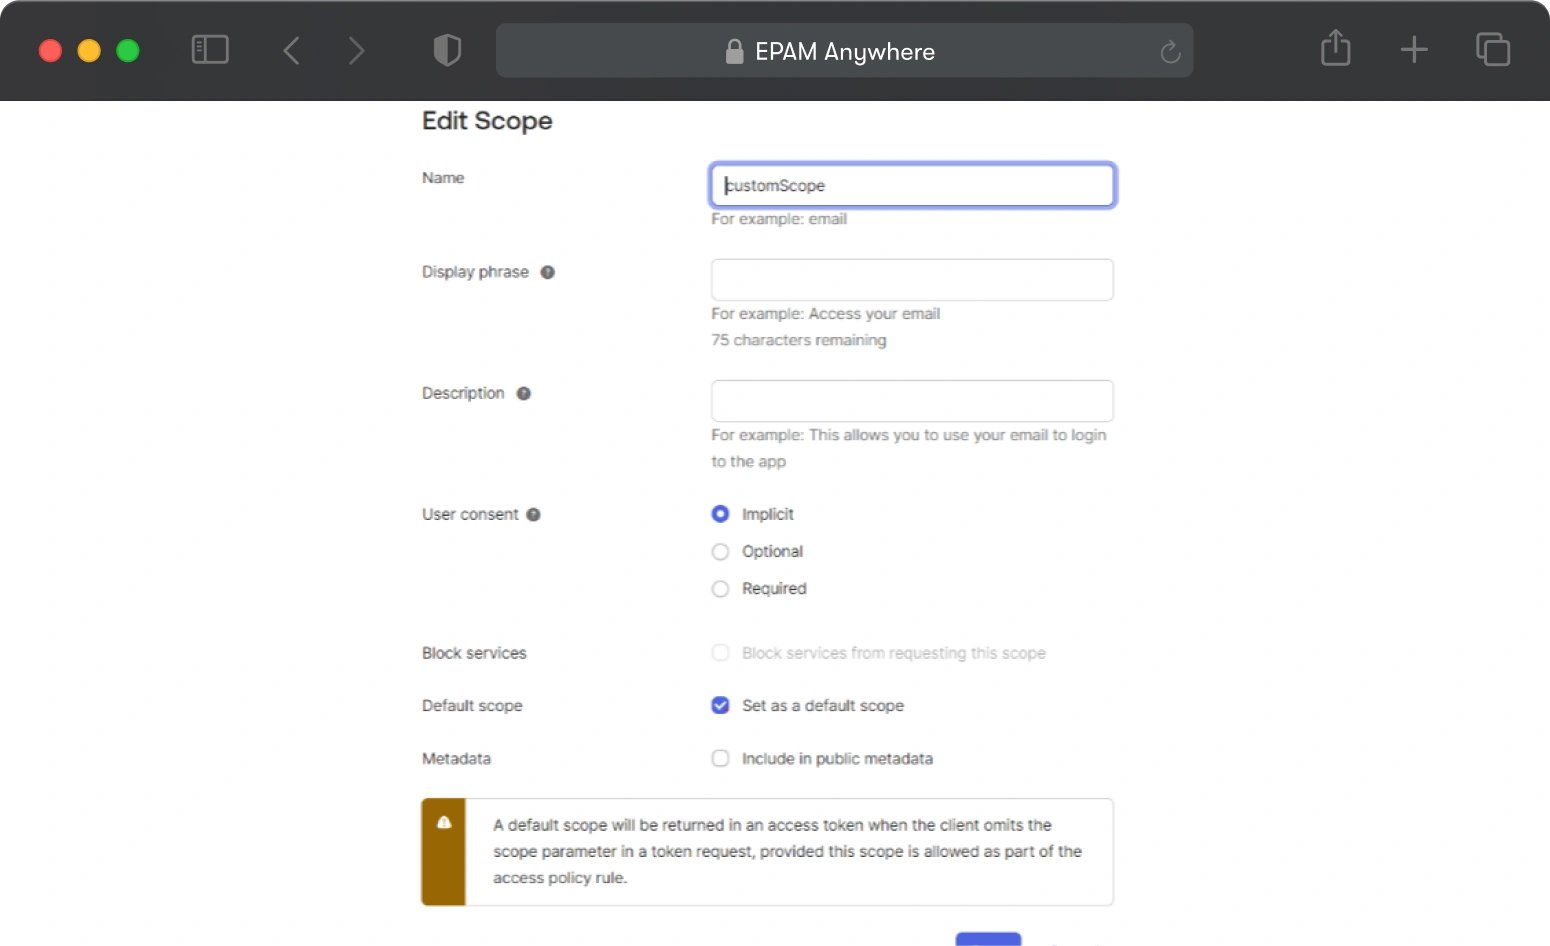
It should look like this:
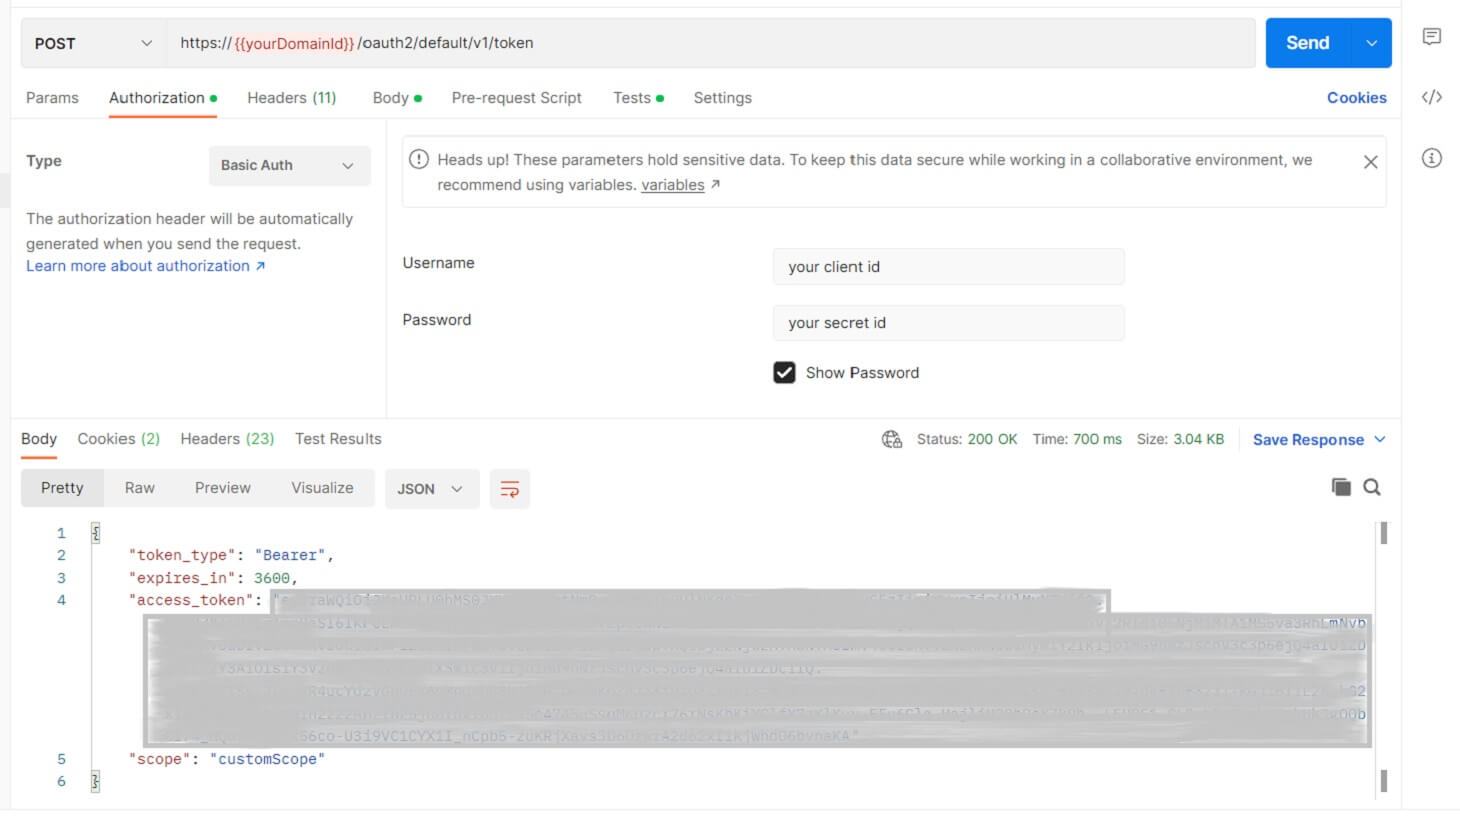
We also need to use basic authorization to send the clientId and secretId that we already had; this will also be encoded and sent in the authorization header.
You should change the https://${yourOktaDomain}/oauth2/default/v1/token URL with your Okta domain ID that you should have saved before, adding your client ID and secret ID in the username and password fields.
When you send the request, you should get a token like this:
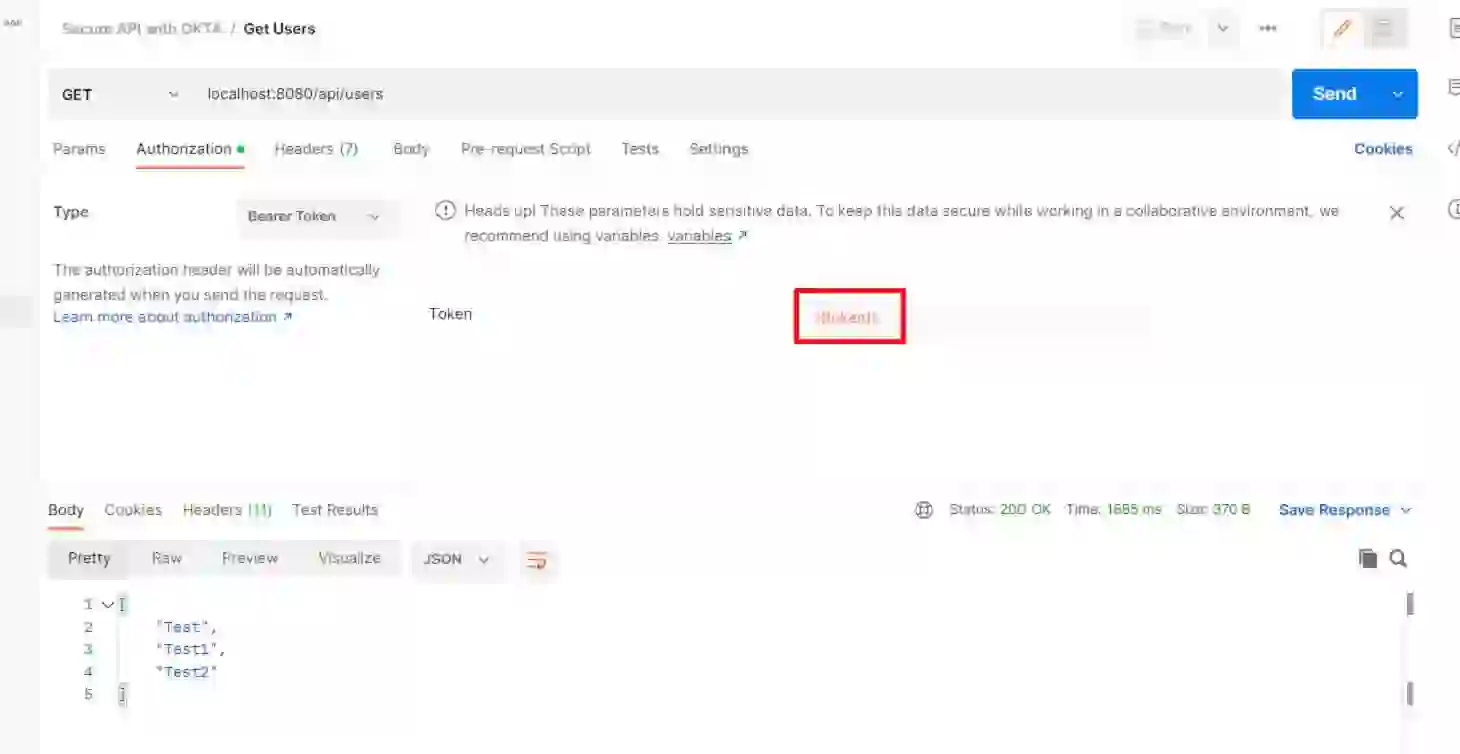
The token will be saved in an environment variable to be used by other requests.
Now you can use the token to access the /api/users protected endpoint.
Great work! We now have access to the protected route and can see the proper result.

That’s all for this quick tutorial and learning about Okta, its concepts, and a quick example.
If you want to see all the examples, go to the master branch using this link.
Happy coding!

I'm a Java developer with 7+ years of experience and high capabilities in all aspects of the Java ecosystem, such as Spring Boot and GCP, designing solutions for people. I also love clean code and algorithms.
I'm a Java developer with 7+ years of experience and high capabilities in all aspects of the Java ecosystem, such as Spring Boot and GCP, designing solutions for people. I also love clean code and algorithms.
Explore our Editorial Policy to learn more about our standards for content creation.
read more


